
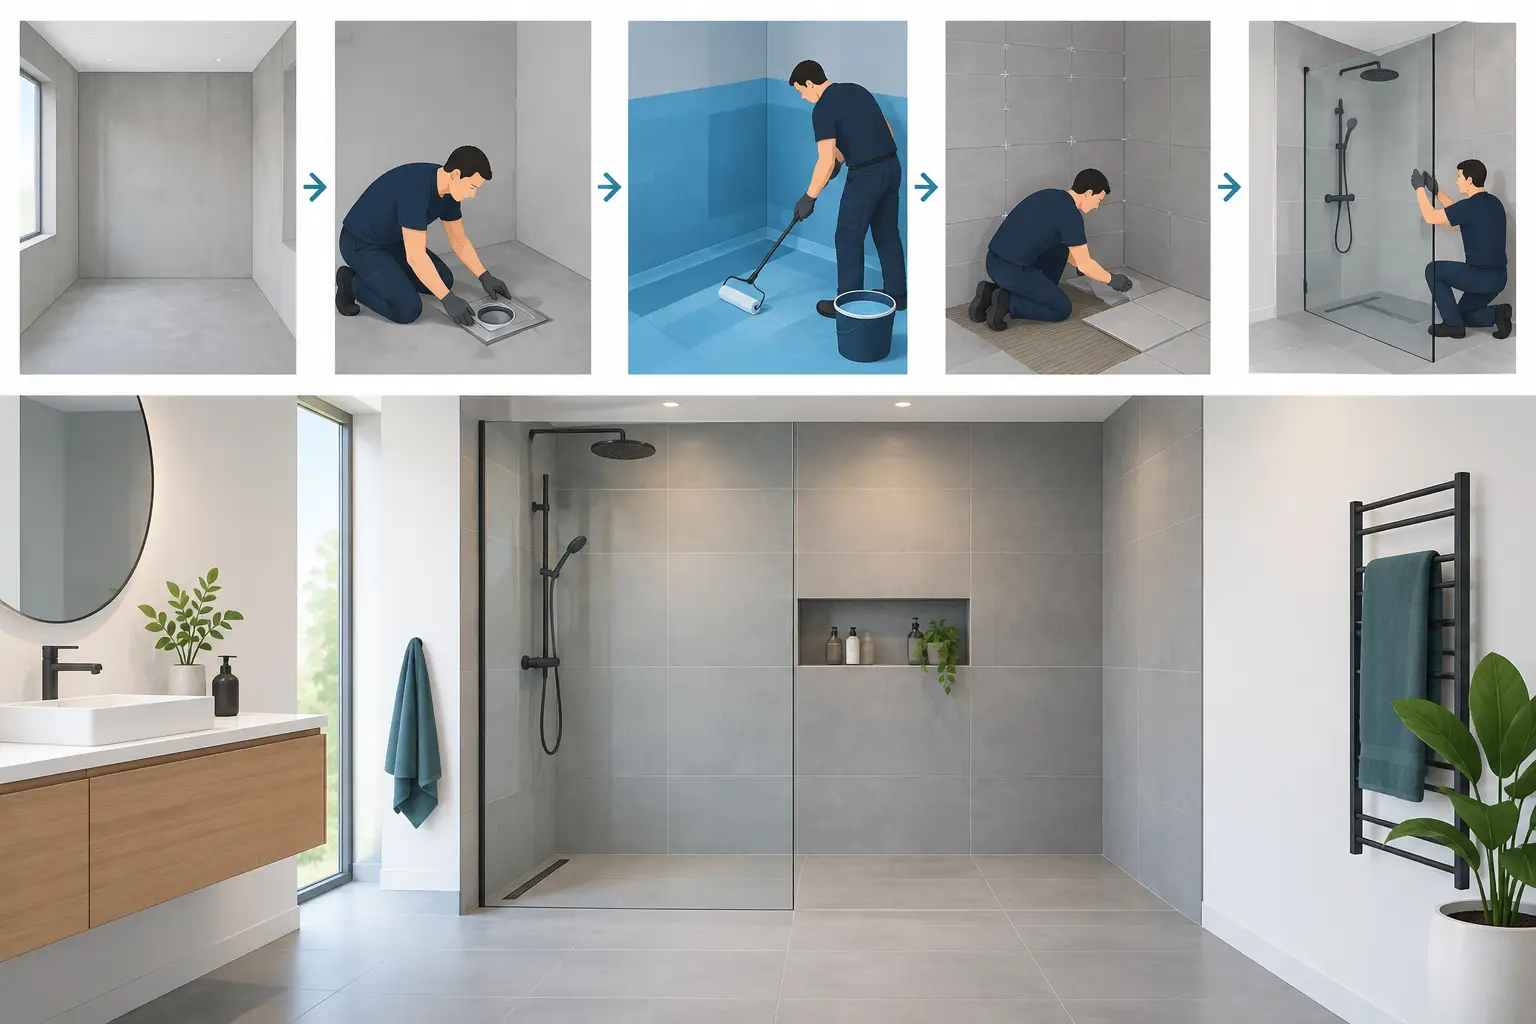
A wet room can make a compact bathroom feel larger, remove awkward shower trays and provide easier access for people with limited mobility. However, the wet room installation process is not simply a case of tiling a shower area and fitting a drain. The quality of the waterproofing, floor fall and drainage beneath the finished surface determines whether the room performs properly for years to come.
For homeowners, landlords and property managers, the best results come from careful planning and qualified installation. A well-built wet room should be practical to clean, comfortable to use and fully protected against hidden water damage.
Start with a survey and realistic design
Every successful wet room begins with an assessment of the existing bathroom. An installer needs to check the condition and construction of the floor, the position of soil pipes and waste pipes, available drainage falls, ventilation, water pressure and the location of electrical services.
This stage is particularly important in upstairs bathrooms. Creating enough fall towards the drain can be more straightforward on a solid ground floor, while timber floors may need strengthening or adjustment to accommodate a former shower tray area and pipework below. It is possible in many properties, but the method and cost depend on what is beneath the floor.
The layout should also be considered before any work starts. A central drain, linear channel drain or corner drain each affects how the floor is formed and tiled. The shower area may be open, screened with glass or separated by a short return wall. An open-plan layout offers a clean look, but it needs enough space and a well-positioned shower to prevent water reaching the door, basin unit or toilet.
At this point, it is worth deciding on the practical details that are expensive to change later. These include recessed shower shelves, shower controls, grab rails, underfloor heating, illuminated mirrors and vanity units. Good bathroom design is not just about the finished appearance. It ensures pipework, fixings and electrical connections are planned around the waterproofed structure.
The wet room installation process in detail
Strip out and prepare the room
The existing suite, wall finishes and floor covering are removed as required. This exposes the subfloor and walls so they can be inspected for leaks, movement, rot or uneven areas. Any damaged timber, loose boards or unsuitable wall surfaces should be dealt with before the new wet room is built.
Preparation can feel like the least visible part of the project, but it is where shortcuts cause problems. Tiles and grout are not waterproof on their own. They are a decorative, hard-wearing surface, not the primary defence against moisture.
Form the correct floor fall
Water must run towards the drain without pooling. This is achieved by creating a controlled gradient, known as a fall, across the shower area or the whole room where appropriate. Depending on the construction, the installer may use a pre-formed shower former, a recessed tray system or a screeded floor.
The right option depends on the floor structure, drain position and desired finish. A level-access wet room is often the preferred choice for accessibility, but it may require more floor preparation than a low-profile shower area. The fall must be sufficient for drainage while still allowing safe, comfortable walking and accurate tile installation.
Drainage is equally important. The waste pipe needs the correct route and gradient, and the drain should be accessible for cleaning. A poorly planned waste run can lead to slow drainage, odours or future maintenance issues, regardless of how attractive the tiles look.
Install plumbing, electrics and ventilation
Once the structure is prepared, first-fix plumbing can be installed for the shower, basin, toilet or bath if one is included. Pipework should be securely fitted, pressure-tested where applicable and positioned so that future connections are straightforward.
Electrical work must be designed for bathroom zones and carried out by a competent professional. This may include lighting, extractor fans, electric underfloor heating, shaver sockets or mirrored cabinets. Bathroom ventilation deserves particular attention. A wet room creates a high level of moisture, so an effective extractor fan helps protect finishes, reduce condensation and maintain a healthier room.
Tank the floor and walls
Tanking is the waterproofing stage, and it is the most critical part of the installation. A specialist waterproof membrane, coating or sheet system is applied to the floor and relevant walls, with careful sealing around corners, joints, pipe penetrations and the drain connection.
The extent of tanking depends on the design. In an open wet room, the whole floor is usually protected, along with the walls in and around the shower zone. Areas exposed to regular splashing need particular care. The waterproof layer must create a continuous barrier behind the tiles, directing any moisture safely towards the drain rather than into the building fabric.
Rushing this stage, or using incompatible products, creates a risk that may not show until months later. Damp patches in adjoining rooms, lifting tiles, damaged ceilings and mould growth can all be signs of a failed waterproofing system.
Tile and finish with care
Only once the tanking system has cured should tiling begin. Floor tiles need to be suitable for wet areas and should offer adequate slip resistance, especially in households with young children, older residents or tenants. Smaller-format tiles can make it easier to follow the floor fall, while larger tiles may suit some layouts if the substrate is formed accurately.
Adhesives, grout and sealants should be specified for wet environments. Movement joints and silicone seals are needed where surfaces meet, such as wall-to-floor junctions and around sanitaryware. Grout should not be treated as a substitute for silicone, and silicone should be renewed when it becomes cracked, loose or discoloured.
The final fit includes the shower screen, shower head, controls, toilet, basin, accessories and any fitted furniture. Care is needed when fixing items to tiled and tanked walls. Penetrations should be planned and sealed correctly so that the waterproof barrier remains protected.
Testing before handover
A professional installation should be tested before the room is signed off for regular use. The shower and basin are run, drainage is checked, and the installer looks for pooling, slow waste flow and leaks around the drain or pipe connections. Shower controls should provide stable temperature and appropriate flow, while the extractor fan and electrical accessories should operate correctly.
It is also sensible to inspect the finished floor when water is running. Some minor surface water can remain on textured tiles, depending on the tile type and floor design, but standing water away from the drain is a concern that should be addressed before completion.
For landlords and commercial property managers, retain any relevant electrical documentation, product details and guarantees with the property records. Clear handover information makes future maintenance simpler and supports compliance responsibilities.
Common mistakes to avoid
The most costly wet room problems usually begin with one of four issues: inadequate drainage falls, incomplete tanking, unsuitable floor construction or poor ventilation. None of these can be reliably solved by applying more grout or sealant once the room is finished.
Choosing finishes too early can also complicate the project. A particular tile size, drain style or flush threshold may be achievable, but it needs to work with the room’s dimensions and underlying structure. Where budget is tight, it is generally wiser to invest in drainage, waterproofing and ventilation before upgrading decorative fittings.
There is also a difference between a fully tanked wet room and a standard bathroom with a walk-in shower. Both can be excellent solutions. A properly designed walk-in shower may be more cost-effective where the room is small, where a complete level floor is not essential or where keeping water contained is a priority.
Plan for long-term maintenance
Wet rooms are straightforward to maintain when the correct products and materials have been used. Clean the drain cover and remove hair regularly, particularly where several people use the shower. Avoid harsh abrasive cleaners that can damage grout, sealant or specialist tile finishes, and keep an eye on silicone joints around screens and fittings.
If drainage starts to slow, water appears outside the shower area unexpectedly or a seal begins to fail, act early. Small maintenance issues are far easier to resolve before moisture reaches hidden layers.
A wet room should feel simple to use because the detailed work has been done out of sight. Whether you are updating a family bathroom, improving accessibility or fitting out a rental property, appointing a qualified installer to assess the structure before work begins is the most reliable way to protect your investment. LCA Maintenance can help homeowners and property managers plan bathroom work with clear advice, professional workmanship and transparent pricing.